Resource Plan - Screen Description
Additional Information
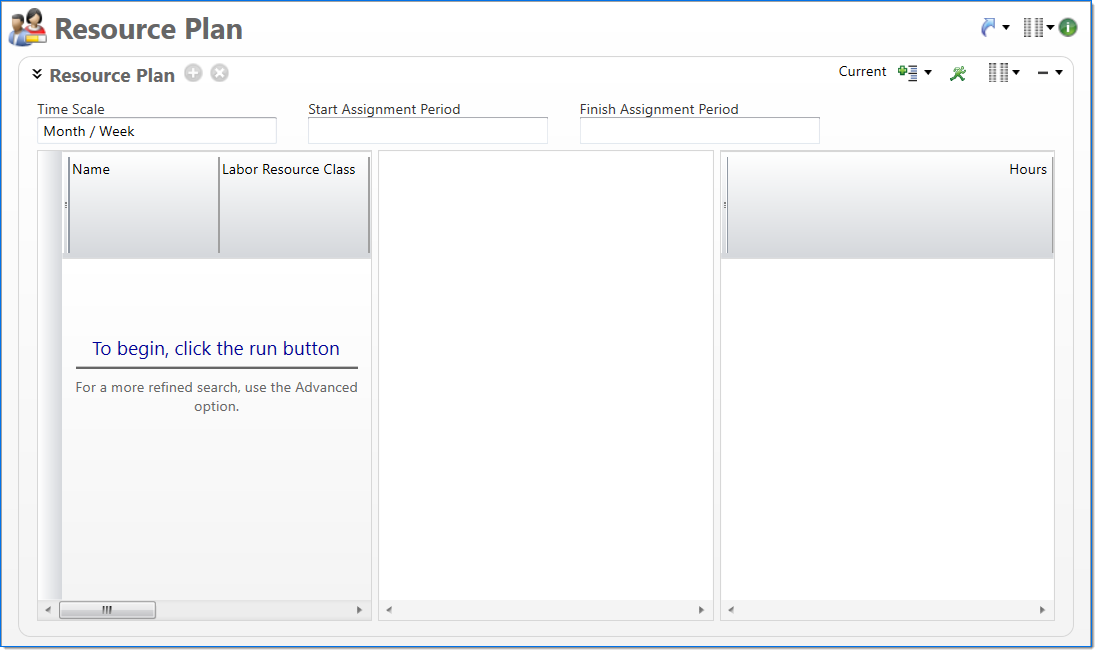
The Resource Plan screen allows you to manage project workload for labor resources. The screen allows you to search for and then review a list of labor resources, which include employees and labor resource classes, and their project assignments. The list is limited based on the resource pools that you manage, or all resources assigned to pools included in a Resource Pool Map where you are the manager at least one of the map levels. You have access to resources in pools at that map level and those in pools below that level. The combined list, the selected date range, and any additional restrictions entered, will be used to retrieve available resources.
Project Managers typically enter the initial assignments, which can span multiple projects, in Project and Project Progress; their entered assignments are available on this screen once they have passed through the Manage Projects or Update Project Progress work flow and are in a Final state.
From this screen, assignments can be added, edited, deleted, or reassigned to ensure that the plan is properly balanced. Specifically, assignments that result in over-allocation or under-utilization are highlighted to help you identify assignments that may need attention. In addition, you can assign work to a labor resource class until you can identify a qualified employee to complete the work.
Click the Show Levels button to see the Resources option, which collapses all rows to the Resource level and the Projects option, which expands all rows to the Project level.
When the resource plan is submitted, changes go directly to a Final state. Project managers can then view the project next to a baseline to see the effects of the changes.
Additionally, you can publish assignments, which allows employees to view the assignments and import them into their timesheet. This also makes assignments available for reporting purposes.
Restrictions
Before you can view the resource plan, you enter a set of restrictions and then search for assignments that match. The restriction fields, which are available at the top of the screen, control how data displays and restrict the returned resources in the Results pane. If you update the restrictions, you must run the search again to view updated results. For more information on how to use restrictions, see Restrictions.
| Field | Description | |
|---|---|---|
| Plan Views |
Click the View button and then select the version of the plan to display in the Hours section of the Results pane:
|
|
| Timescale |
Displays the Month / Week default scheduling scale to be used in the Hours section of the Results pane. This value will default based on your last used selection. The year / month displays in the top section of the header and the date range displays below this, for example, 9/12 - 9/18. For more information on the definition of scheduling calendar and how it is used, see Scheduling Calendar and Calendars Used in Project and Resource Scheduling. |
|
| Start Assignment Period |
Enter or select an assignment period. This is the first period in the date range used to filter assignments. This value will default based on your last used selection. |
|
| Finish Assignment Period |
Enter or select an assignment period. This is the last period in the date range used to filter assignments.This value will default based on your last used selection. |
|
Additional restrictions are available in the Restrictions area, which can be accessed by clicking the restrictions button.
| Field | Description | |
|---|---|---|
| Resource Pool | Enter or select a resource pool to be used for scheduling. | |
| Labor Resource Class | Enter or select a labor resource class to be used for scheduling. | |
| Location | Enter or select a location to be used for scheduling. | |
|
Note: Inactive employees and inactive Labor Resource Classes are not displayed if they have no scheduled hours between the Start Assignment Period and the Finish Assignment Period selected. Pending Active, Pending Inactive and Active statuses will display. |
For a list of the additional optional restrictions, see ![]() Resource Plan Optional Restrictions.
Resource Plan Optional Restrictions.
Results Pane
The Results pane displays a list of resources and their assignments that are in your resource pool and match the entered restrictions. The pane is divided into three sections, which include resource details, hours, and totals data.
For each resource, if any exceptions that limit an employee's work capacity exist (e.g. an annual holiday), a read-only row displays at the top level of the assignments for the resource. The row includes the employee's Work Calendar code and name and the number of hours of the exception.
Resources
The Resources section, which is the first section of the results pane, displays a hierarchical list of resources and their assignments. Assignments are displayed as a two-level hierarchical list. The list is limited based on the resource pools that you manage, the selected date range, and any additional restrictions entered.
-
Resource Rows: The first level of the list, or the resource row, displays a read-only row of information about the employee or labor resource class. For detailed information about each column, see
 Resource Row Column Descriptions.
 -
Assignment Rows: The second level of the list, or the assignment level, displays rows of current or published assignments for the resource. Assignment rows can be added and deleted, with some restrictions, as needed. For detailed information about each column, see
Assignment Row Column Descriptions.
 ). For information on how to display the optional columns, see
Drag / Drop Function for Assignment rows
You can drag selected task assignment rows up or down and drop these rows onto or below a different resource row.
|
Note: The selected task assignment rows may or may not be adjacent to each other. Dragging / dropping moves all hours corresponding to each source task assignment row in the middle pane from the source resources to the target resource. |
Only hours displayed in the middle pane are moved. Existing hours for the task assignment row either before the Start Assignment Period or after the Finish Assignment Period are not affected when using drag / drop.
After selecting one or more assignment rows in the left panel:
- The drag function can be used for the following:
- Selected rows must be all task assignment rows. Resource rows and / or holiday rows cannot be dropped.
- Selected rows can only be dropped on or below a resource row in the left pane.
- Assignment rows cannot be dropped on or beneath any of the source resource rows to reorder the source resource’s tasks.
- Assignment rows can be moved between employees, between labor resource classes, from an employee to a labor resource class or from a labor resource class to an employee.
- You can invoke the scroll by dragging the source assignment rows to the top or bottom edge of the window when a resource row is scrolled out of view.
- A successful drop action:
- Adds an instance of each assignment row beneath the target resource, even if the target resource already has an existing assignment row corresponding to the project / task of the assignment row.
- Copies any comments or descriptions that exist on selected assignment rows to the corresponding assignment row.
- Copies any hours displayed in the middle pane for each of the assignment rows to the corresponding cells in the assignment row.
- Sets the tentative indicator, if it is set on an assignment, on the corresponding assignment.
- Adds all assignment row hours as unpublished.
- Deletes all hours within the Start / Finish Assignment Period window for the assignment rows and removes any associated published hours, as if you had published after deleting.
- Total Rows: At the bottom of the grid section, a total of all assignments and a total of assignments to chargeable tasks is displayed.
Hours
The Hours section, which is the middle section of the results pane, provides time-phased columns that allow you to review assignments for the resources displayed in the Resources section of the grid. The available time span is dependent on your selections in the Restriction fields and the system Scheduling Calendar. In addition, the Plan View restriction defines if this area displays the current, published, or a comparison of the two plans.
When in the Current Plan or Current vs Published plan view, you can enter, edit, or delete the number of hours that the resource will work on the task for the time period.
Note: If there are no working days within in the time period where an assignment is entered, the entry is removed and reverted to the initial value when leaving the cell. However, if hours were previously entered in the time period before the days were changed to non-working, the value can be deleted. Working days are defined as part of project's assigned Project Work Calendar, so different projects for a resource in the same time period may have varying working days.
Over allocation, underutilization, and tentative employee assignments are displayed with the following markers:
- Over allocation is displayed as a red, up arrow (
 ) to the right of an assignment value. The indicator displays for assignment rows and also rolls up to resource rows. For more information, see Allocation.
 - Underutilization is displayed as a blue, down arrow (
 ) to the right of an assignment value. The indicator displays for assignment rows also rolls up to resource rows. For more information, see Utilization.
 - Tentative assignments are displayed with a dash (
 ) to the right of an assignment value. Due to the different timescale views, a cell could contain tentative and non-tentative assignments; cells with a combination of assignments display with a broken dash (
 ) to the right of the assignment value. In addition, the indicator displays for assignment rows but also rolls up to resource rows.
When you view a comparison view between the current and published plans, discrepancies between the plans are italicized and highlighted in yellow. Discrepancies include different values, tentative flags, and blank values. If a value exists in the published but not the current plan, a highlighted blank cell is displayed. Discrepancies in hours and tentative flags are highlighted in separate portions of the cell.
For each resource, the resource row displays a roll up total of displayed assignments. In addition, two rows at the bottom of the grid display assignment totals. The first row displays a straight total of all assignments displayed in the grid and the second row displays assignment totals of assignments for chargeable tasks.
Totals
The Totals section, which is the last section of the results pane, displays totals for each row across the selected date range. The totals are updated as you enter and edit assignments.
A total of each column is displayed on the bottom line of the grid.